
Group client accounts with User Groups
In short
User Groups let you sort the users in your Web Portal into named groups, for example one group per client company or per site. Groups help you find a client's users quickly and act on all of them at once, such as assigning a policy to every user in the group. A group is only a label for organizing users: it has no settings of its own, and adding a user to a group doesn't change their backups, Storage Vaults or billing. Only portal admins see groups. The user doesn't see which group they're in and can't change it.
Note: Button and menu names below are from the standard Web Portal. If your portal uses partner branding, a few labels may look slightly different.
Why group client accounts
- Keep each client together. If a client has several users (for example one per server or per person), put them in one group named after the client.
- Find users faster. The Users page can list users under their group names, with a member count for each group.
- Change a whole client at once. Select a group to select all of its users, then use a bulk action such as Assign Policy....
Create a group
- In the Web Portal, go to Users.
- Click Add user group....
- Enter a User Group Name, for example the client's company name.
- Click Add user group. A notification confirms the group was added. Click its Click here to view group. link to open the group's page.
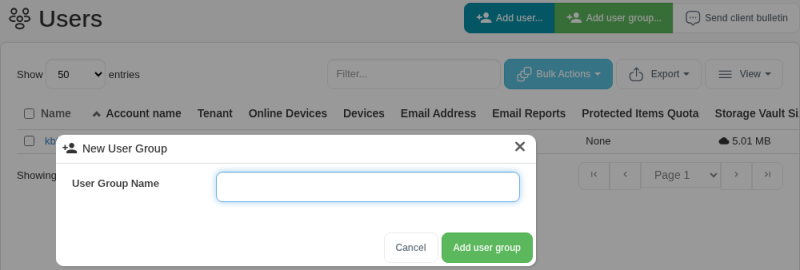
You can also create a group while moving users into it. See the next section.
Add users to a group
Move several existing users at once
- On the Users page, tick the checkbox next to each user you want to move.
- Open Bulk Actions and choose Move users to group....
- The Move users to group dialog opens. In the User Group list, pick an existing group. To put the users in a new group, pick [Create New User Group] instead. You can't type a group name straight into this list.
- Click Move users to group.
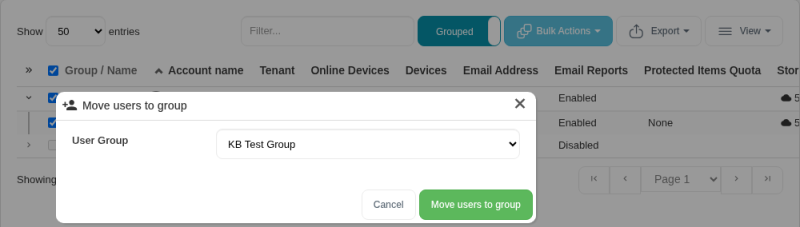
A user can only be in one group at a time. Moving a user to a new group takes them out of their old one.
Change one user's group from their profile
- Go to Users and click the user's name.
- On the user's Profile tab, find the User Group row.
- Use the buttons in that row to assign the user to a group, change their group, or remove them from their group.
Add a new user straight into a group
- When you click Add user... on the Users page, pick the group in the User Group list before you create the user.
- Or open the group's page and click Add user... there. The new user is put in that group automatically.
View and manage a group
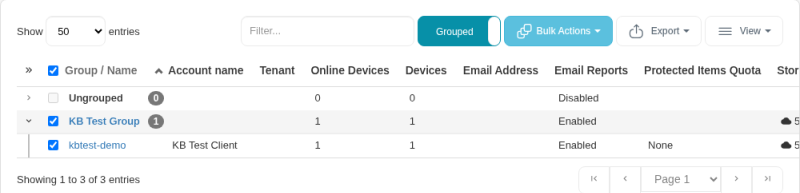
- Grouped view: once you have at least one group, the Users page has a Grouped / Ungrouped toggle next to the filter box. Click it to switch views. In the grouped view, the first column is labeled Group / Name. Each group is listed with a member count, and you expand it to see its users. Users without a group are listed under Ungrouped.
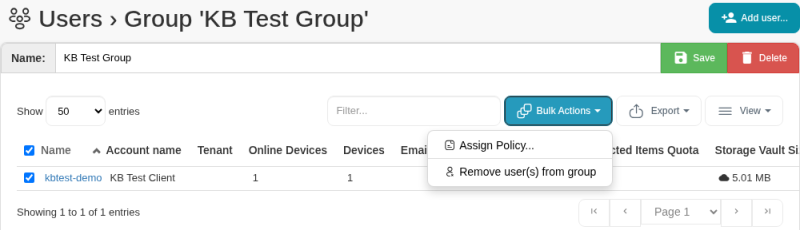
- Group page: click a group's name to open its page. There you can see its members, rename the group (change Name and click Save), add users, or select members and choose Remove user(s) from group.
- Remove users from a group: on the Users page or the group page, select the users and choose Remove user(s) from group from Bulk Actions. The users stay in the portal. They just no longer belong to a group.
- Delete a group: open the group's page and click Delete. When asked "Are you sure you want to delete this User group?", click OK.
What grouping affects
- Organizing and filtering the Users page (grouped view and Group column).
- Bulk actions: in the grouped view, ticking a group's checkbox selects all of its users. You can then use bulk actions on the whole group, for example Assign Policy... to put every user in a client's group on the same policy.
Assign a policy to a whole group
- Open the group's page, or tick the group's checkbox in the grouped view of the Users page.
- Select the users. On the group's page, tick the checkbox in the header row to select all of them.
- Open Bulk Actions and choose Assign Policy....
- In the Select Policy dialog, choose the policy in the Policy: list, for example Default Policy, and click Select.
Grouping doesn't change a user's backups, schedules, retention, quotas, Storage Vaults or billing. Those come from the user's own settings and the policy you assign. See Policy Settings.
Tips
- Pick one naming scheme, such as the client's company name, and stick to it so groups are easy to scan.
- To roll out a policy to a client, group the client's users first, then assign the policy to the whole group in one step.
Need help? Email support@magnusbox.com.